I Am a Sourdough Enthusiast.
I baked my very first loaf in 2017 and guess what? It was a disaster.
A friend gave me a starter and some vague instructions that were nowhere near specific enough for a novice like me. My early loaves were heavy, hard, and only barely edible—if eaten fresh out of the oven.
But I was determined. I devoured sourdough blogs, checked out bread books from the library, and turned my kitchen into a full-time flour zone.
At the time, life felt a little out of control. I had a kindergartener who was constantly sick and a fourth grader with a world-class eye roll. So I did what any rational person would do: I channeled all my chaos into the pursuit of the perfect loaf.
Needless to say, I went through a lot of flour.
But despite the failures, I was hooked. I even recruited a friend, and together we experimented, swapped tips, and eventually became pretty solid sourdough bakers.

The book that became my bible was Tartine. One sunny January morning, I was lucky enough to be standing outside Tartine Bakery in San Francisco with my sister, cousin, and business partner.
(It might be worth mentioning that the reason I was in SF is because I was awarded a small business fellowship to attend the very first How I Built This Summit—where I met my hero, Guy Raz!!


At Tartine, I ate more bread in one day than a single human probably should. And while it was divine, it was also humbling—I realized that even after baking hundreds of loaves, I still had so much more to learn.

Over the years, I picked up a few things—tips, tricks, and techniques that made a big difference in my bakes. I’ll share those below in the hopes that they’ll save you some flour and frustration.
But here’s something else I realized along the way: unless you're planning to eat the entire loaf in one sitting (respect), how you store your sourdough is almost as important as how you bake it.
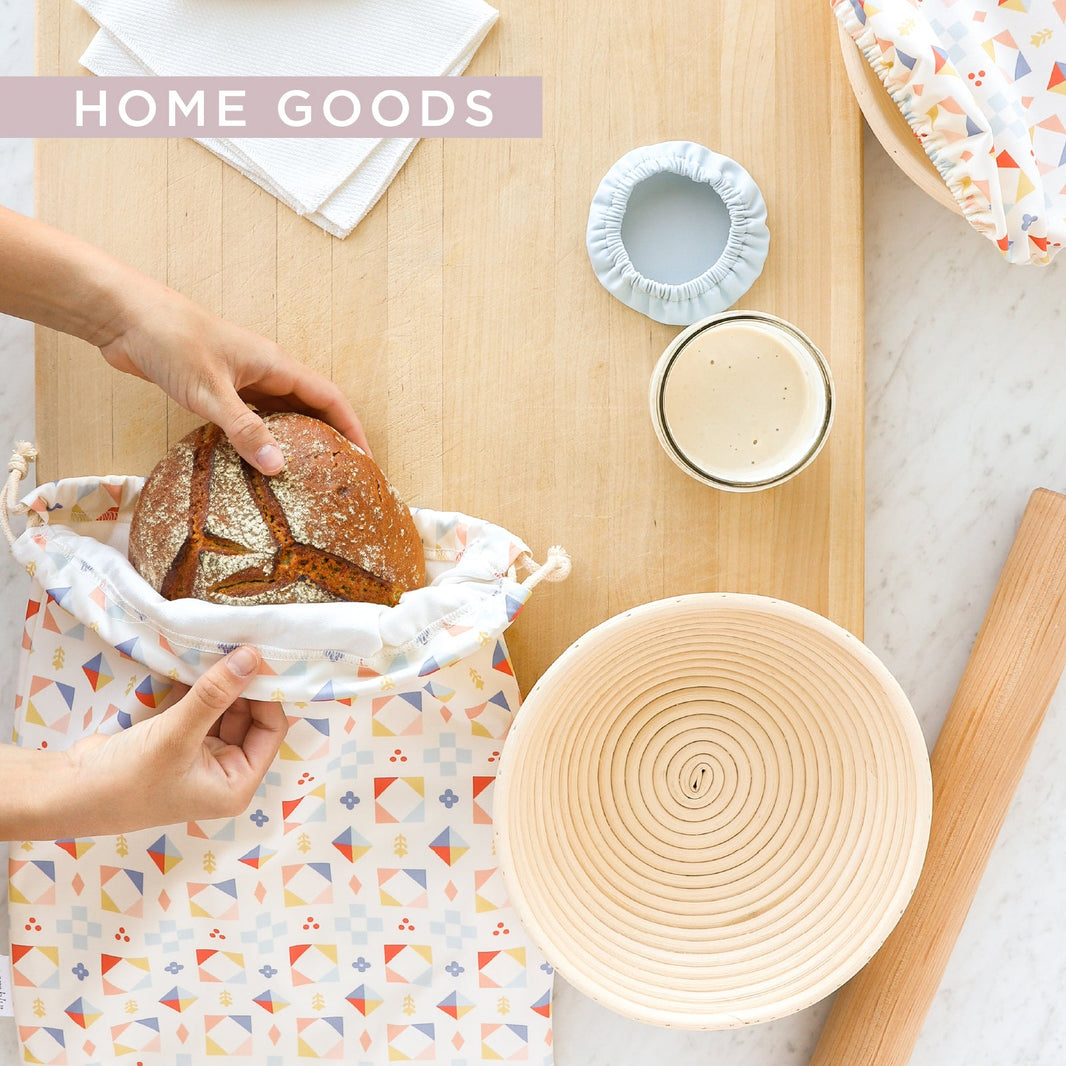
We all want that crisp crust and soft, springy inside to last as long as possible. So I started researching, testing materials, and trying out different storage methods. What I found was this: to keep bread moist and crisp, you need a dual-layered bag —one layer to absorb excess moisture and another to trap just enough to prevent drying out.
I sewed up my very first bread bag during Covid. I was in lockdown in NYC so had no choice but to use materials I had in my house. What does the owner of a diaper company always have on hand? Organic cotton and TPU! Miraculously, my creation worked and now, that very same design is available as our Sourdough Set.
Ok enough of that, lets talk bread baking! Here are my insider tips.
For full instructions, check out our complete How to Make Sourdough Bread Guide here.

Liz's Sourdough Tips
(The kind you only learn the hard way...)
1. Feed your starter like it’s a houseplant you actually like.
Don’t overthink it. Feed your friend fresh flour and warm water daily to keep it bubbly and happy!
2. Let the dough rest before adding salt.
I used to dump everything in the bowl at once. Don’t. Mix the flour, water, and starter first and let it sit for 20–30 minutes. THEN add salt. This simple pause magically makes the dough easier to work with and helps the gluten do its thing.
3. Don’t knead—just stretch and fold.
Instead of kneading like a maniac, every 30 minutes during the rise, just wet your hand, gently lift a corner of dough and fold it over. Turn the bowl and repeat.
4. Time = flavor.
Want that deep, tangy flavor? Let your shaped dough rise slowly in the fridge overnight. I promise it’s worth it. Bonus: cold dough is way easier to score!
5. The Dutch oven trick.
Pop your Dutch oven into the oven while it preheats. I know it sounds like overkill, but that screaming-hot pot gives you amazing oven spring and the crust dreams are made of. Steam, baby.
6. Score with confidence.
A hesitant slash is a sad slash. Use a super sharp knife or razor and go bold—at about a 45-degree angle. Even one clean line across the top will let the loaf expand beautifully.
7. Don’t overbake... but don’t underbake either.
Take the lid off your Dutch oven halfway through and let the crust get deep golden. You want it to look rustic and caramelized, not pale and shy. Trust me, it makes the chew so much better.
